A new remote, a replacement for one that went missing, or a move into a new home: sooner or later, most homeowners need to program a garage door opener remote. The good news is that on most modern openers the job only takes a few minutes and needs no tools beyond a sturdy step ladder.
Before You Start: Three Quick Checks
- Confirm compatibility. Remotes are not universal by default. Check the brand and model of your opener (printed on the motor unit label) and make sure the remote lists it as compatible.
- Put in a fresh battery. A weak battery is one of the most common reasons pairing fails. In Florida, a remote that lives on a sun visor in a hot car tends to wear through batteries faster.
- Clear the doorway. The door will move during testing, so keep people, pets, and vehicles out of its path, and set your ladder beside the motor unit, never under the door.
How to Program a Remote Using the Learn Button
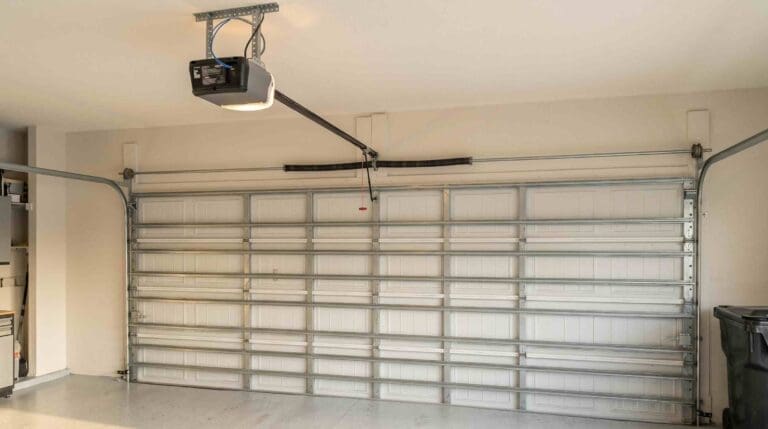
Most modern openers, including LiftMaster, Chamberlain, Craftsman, and Genie models, pair with remotes through a “Learn” or “Program” button on the motor unit, the box mounted on the garage ceiling (or beside the door on wall-mounted units).
- Find the Learn button. Look on the back or side panel of the motor unit, often under the light lens cover and near the hanging antenna wire. On many LiftMaster and Chamberlain units it is a colored button (yellow, purple, red or orange, or green) with a small LED beside it. Genie units usually label it “Program” or “Learn Code”.
- Press and release the button once. Do not hold it down. The LED lights up or begins to blink, which means the opener is listening for a new remote. You typically have about 30 seconds.
- Press the remote button you want to use. Hold it (or, on some Genie models, press and release it a few times) until the opener’s light bulbs flash or you hear two clicks. That is the confirmation.
- Test it. Step down from the ladder, wait for the LED to go out, and press the remote button. The door should move.
A Warning About Holding the Learn Button
Holding the Learn button down for several seconds (about six on many models) until the LED goes out does not pair anything: it erases every remote and keypad from the opener’s memory. That is useful in some situations, covered below, but frustrating if you do it by accident.
Programming a Wireless Keypad
Outdoor keypads pair in much the same way. Press the Learn button on the motor unit, then, within the pairing window, enter the PIN of your choice on the keypad and press Enter. The opener lights flash to confirm. Exact sequences vary by model, so keep the keypad’s instruction sheet handy.
Programming Your Car’s Built-In Buttons
Many vehicles have built-in garage buttons, and HomeLink is the most common system. The general process has two phases. First, the car learns the signal from your handheld remote: you hold the car button and the remote button together, with the remote a few inches away, until the car’s indicator light changes. Second, for rolling code openers, you press the Learn button on the motor unit and return to the car within about 30 seconds to press the programmed button two or three times.
Steps vary by vehicle make and year, so follow your owner’s manual. Some combinations of newer openers and older vehicles need a compatibility bridge to talk to each other.
When to Erase All Codes and Start Fresh
Clearing the opener’s memory, then reprogramming only the remotes in your hands, is a smart move when:
- You just bought or moved into a home. You have no way to know how many remotes, keypad codes, or car buttons from previous owners, tenants, or contractors still open the door.
- A remote was lost or stolen, especially one that was left in a car.
- You manage a rental or vacation home. Short-term rentals are common around the Kissimmee area, and resetting codes between long-term tenants keeps access under control.
After erasing, reprogram every remote, keypad, and car you want to keep. If you live in an HOA or gated community, remember that the clicker for the community gate is a separate system managed by the association. Programming your own garage door opener does not affect it, and the HOA office handles gate credentials.
Why Your Remote Will Not Program: Troubleshooting
- Wrong remote technology. Openers and remotes must share the same frequency and code type. A remote built for a newer security standard may not work with an older motor, and the reverse is also true.
- Memory is full. Openers store a limited number of devices. Erase all codes and reprogram the ones you use.
- LED bulb interference. Some LED and CFL bulbs in or near the opener produce radio interference that shortens remote range or blocks pairing. Remove the bulbs temporarily; if range improves, switch to bulbs rated for garage door openers.
- Lock mode. Many wall controls have a Lock button that disables all remotes. If the wall button works but no remote does, check that the lock is off.
- Storm damage. Central Florida’s frequent lightning and power surges can damage an opener’s logic board or radio receiver. If your remotes stopped working right after a storm and will not pair again, the board likely needs a professional diagnosis.
- Very old openers. Units with small DIP switches instead of a Learn button use fixed codes, which are less secure. You pair them by matching the switch positions in the remote to those in the motor, but an opener of that age is usually a candidate for replacement. See our guide to the signs it’s time to replace your garage door opener.
If the remote pairs but the door then reverses, stops partway, or only closes when you hold the wall button, the remote is not the problem. That points to the safety sensors, the travel settings, or the door itself, and it is time for a professional garage door repair visit.
Safety Notes
Programming a remote is a safe DIY task. The hardware around it is not. Use a stable ladder, never stand under a moving door, and do not touch the springs, cables, or tracks while you are up there. Those parts are under high tension and should only be adjusted or repaired by a trained technician.
When to Call a Professional
If you have tried fresh batteries, a compatible remote, and a full memory reset without success, the receiver or logic board may be failing, or the opener may simply be too old for today’s remotes. Garage Door Experts has served Central Florida for more than 14 years as a licensed Florida contractor, offering same-day garage door opener installation and repair from our Kissimmee headquarters and our Clermont location. Our technicians help homeowners in Kissimmee, Orlando, and St. Cloud with remotes, keypads, and opener replacements.
Frequently Asked Questions
How long does it take to program a garage door remote?
Usually just a few minutes, once you have located the Learn button and have a compatible remote with a fresh battery.
Can I program a remote if my opener has no Learn button?
An opener with no Learn button is most likely an older DIP switch model, and you pair it by matching the switch positions inside the remote to those on the motor unit. If your opener has a Learn button that is hard to reach, check your manual: some wall control panels can start learn mode for you.
Will programming a new remote erase my old ones?
No. Adding a remote keeps the existing ones working. Only holding the Learn button down until the LED goes out erases everything.
Need Help With Your Garage Door Opener?
If your remote still will not cooperate, or your opener is showing its age, call Garage Door Experts at 689-319-8691 or contact us online. We offer same-day appointments and 24/7 emergency service across Central Florida.